Skip to content
  • Solutions
  • Resources
  • Events
  • About Us

Create Your Website

Start Building Your Website

Drag & Drop to Build Your Page

Start Selling Online

Selling Product

Reach Your Potential Online Consumers

Booking & Ticketing

Appointment, Rentals and Events

Sales & Marketing Tools

Agent & Affiliate

Boost Your Sales with Agents

Sales Campaign

Direct Customers to the Right Product

Reach Your Audience

Online Email Marketing Tools

Business Overview

Manage Your Store

Business Details and Information

Analytics & Reporting

View Your Online Web Performance

Our Story

Who Are We?

Board Members

Social Media

Facebook

Instagram

Tiktok

Youtube

Github

Reddit

Contact Us

Get in Touch

Support Form

LuluStore

9
  • How to view all orders
  • View Specific Order
  • Overview of an order
  • View, Print, Email and Delete customer invoice
  • To change status of a order
  • Customer History
  • Order Notes
  • Order Actions
  • Import & Export

LuluCreate

8
  • Banner Design: Adding or editing pictures
  • Banner Design: Adding links
  • Banner Design: Text editing
  • Banner Design: Basic Controls
  • Customize your website header
  • Create a page for news or blogs
  • Manage your media inside your website
  • Manage all your website pages

LuluReserve

12
  • Add an appointment
  • Add a Resource
  • Add a Package
  • Add a Category
  • How to add services
  • How to view employees
  • Navigating LuluReserve’s Dashboard
  • Set company-wide days off
  • Set company-wide working hours.
  • How add an employee on LuluReserve
  • How to view your employee on LuluReserve
  • How to view LuluReserve dashboard

LuluPromo

4
  • Create a new Affiliate Group
  • Add a new Affiliate
  • Fine-tune coupon setting by using advanced feature
  • Create a coupon for your customer

LuluBlaster

13
  • Create a recurring email
  • View all your email campaign
  • How to add users into a contact tag – Choose from existing list
  • How to add users into a contact tag – Manually add customer info
  • How to create new tags to be assigned to a contact
  • How to add users into a contact list – Choose from existing list
  • How to add users into a contact list – Manually add customer info
  • Group contacts in a broad spectrum with contact list
  • Add a contact manually
  • How to export your contact list to a CSV file
  • How to import contacts from CSV file
  • How to show all contacts in LuluBlaster
  • LuluBlaster Dashboard

LuluInsight

10
  • Overview
  • Products
  • Categories
  • Variations
  • Orders
  • Coupon
  • Revenue
  • Taxes
  • Stocks
  • Downloads

LuluAdmin

3
  • Business Manager
  • Users
  • Manage your company general information
  • Home
  • Docs
  • LuluAdmin
  • Manage your company general information

Manage your company general information

LuluAdmin is basically where you can manage your company basic information so that the website can set regional information, tax and shipping for your store.

To manage your company basic information do as follow :-

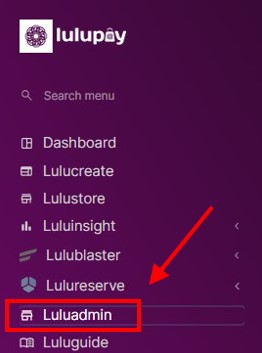
1. Log in and go to your website Dashboard, Click on Luluadmin.

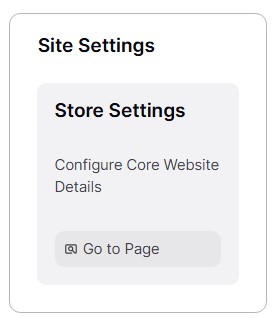
2. Click on Store Settings.

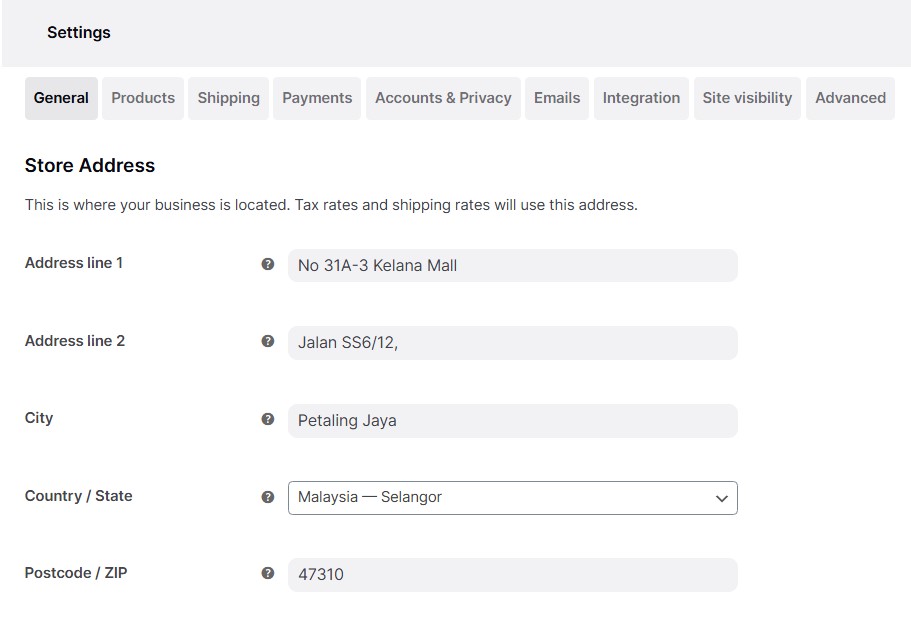
3. Now you can see were you can fill in your store address.

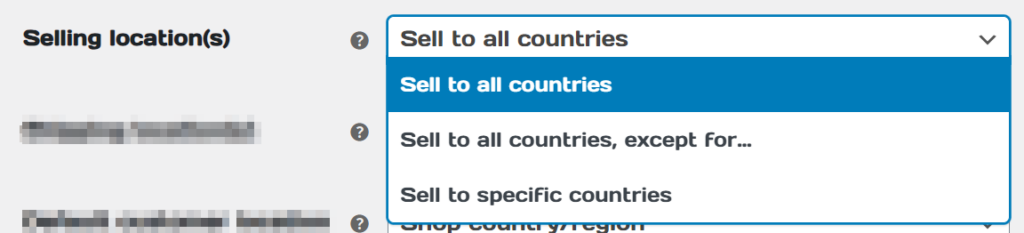
4. On the bottom you can see ‘General Options’. Selling locations is where you can set where your item can be sold. Note that if you choose the last 2 options, another box will pop up so you can select the countries.

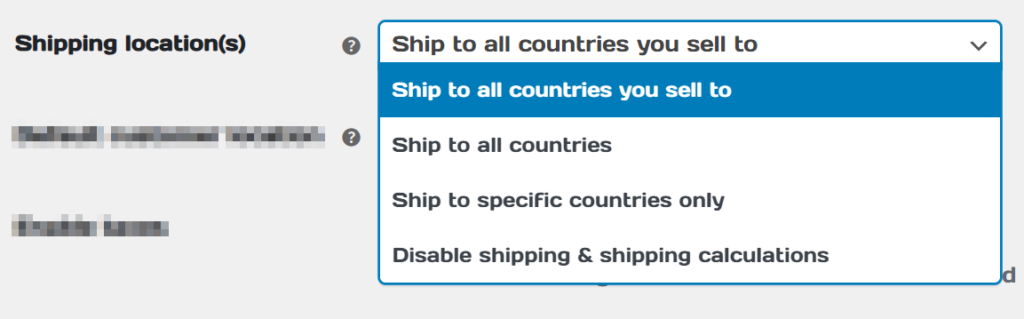
5. Shipping location is where you can choose on where country that you will shipped. You will chose this option where you will shipped physical item to customer. By Default it will follow the same countries that you choose to sell above.

6. Default customer location is where the setting determines the assumed location of visitors to your site before they provide any address information during checkout. It is used to estimate default tax and shipping rates. The available options are:

  1. Shop Base Address – Assumes that customers are located in the same region as your store.
  2. No Address – Taxes and shipping are only calculated after the customer enters their address.
  3. Geolocate Address – Identifies the customer’s current location to automatically calculate taxes and shipping, using the Maxmind Geolocation Integration.
  4. Geolocate with Page Caching Support – Similar to geolocation, but it performs the location detection via Ajax to support page caching.

7. Enable taxes is where you can choose whether to include or exclude tax payment on every order.

8. Enable coupons is to enable or disable options for the customer to use coupon codes.

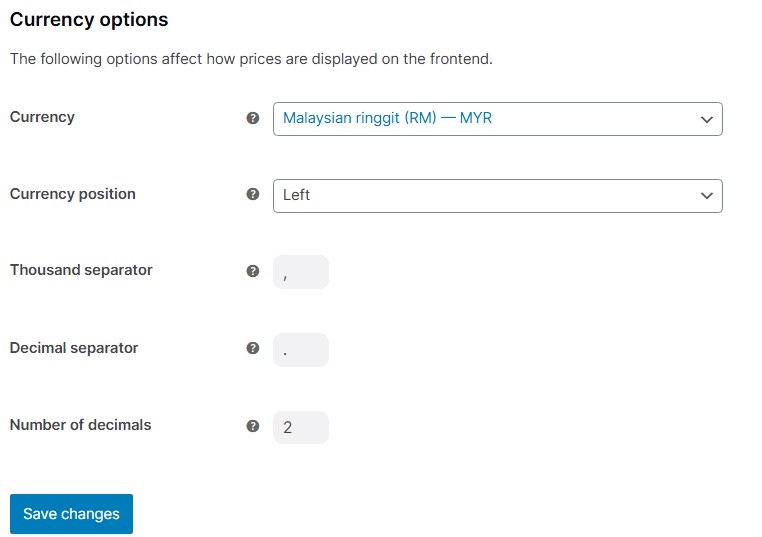
9. The last options is ‘Currency Options’. Currency options control how prices are shown to customers in your store.

What are your Feelings
Share This Article :
  • Facebook
  • Twitter
  • LinkedIn
  • Pinterest
Still stuck? How can we help?

How can we help?

Updated on March 10, 2025
Users

Leave a Reply Cancel reply

Your email address will not be published. Required fields are marked *

Support

Help center

Hire a Professional

Solutions

Online store builder

Website builder

Ecommerce website

Products

E-Commerce

Booking Services

Digital Marketing

Copyright © 2024 All Right Reserved – Lulupay Sdn Bhd
Facebook Instagram Tiktok Youtube
E-mail Call Facebook Chat
For more information visit Helper page.