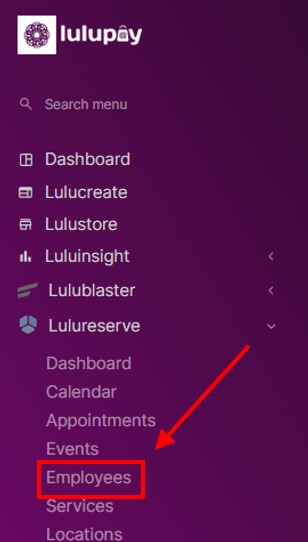
To access the employee information, please hover over the “LuluReserve” tab and select the “Employees” option from the dropdown menu.
Employees are individuals who work for your business and provide services based on the nature of your operations.
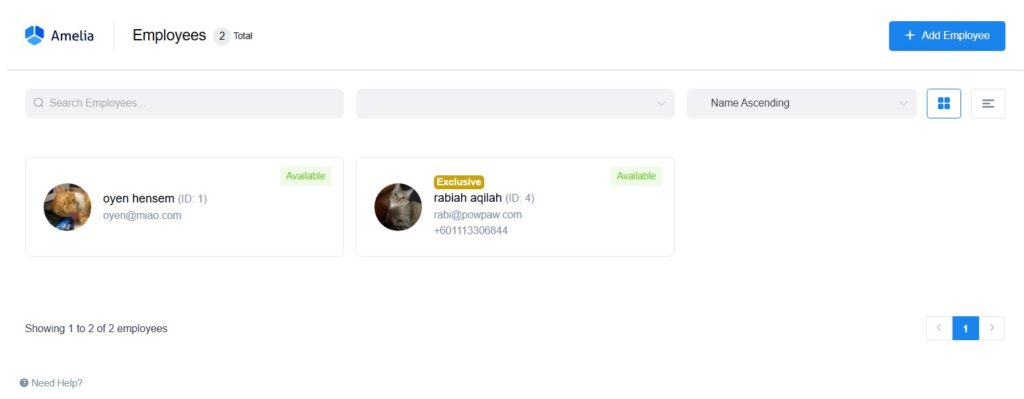
Adding an Employee #
- Click on “Add Employee”.

2. After clicking on “Add Employee,” a new pop-up will appear, as illustrated below. Each employee profile consists of five sections that need to be completed, starting with the “Details” section.
Details (1/5) #
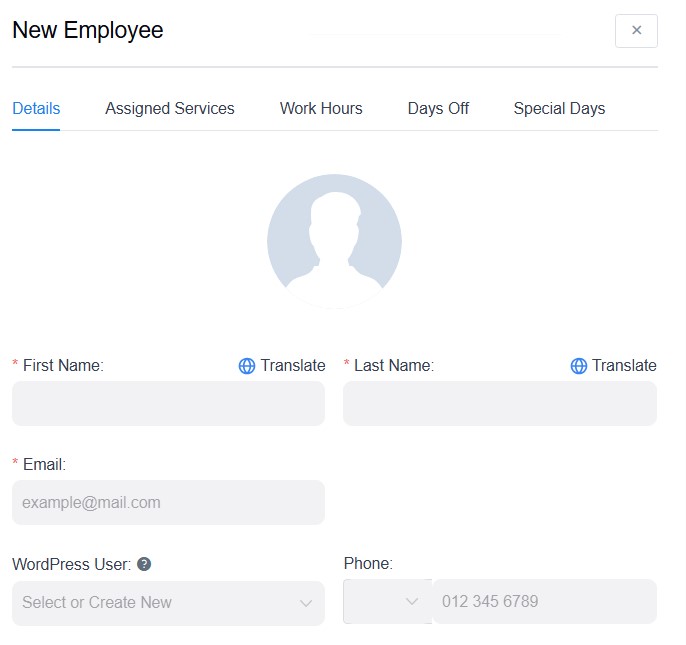
3. Fill in the following :-
- First Name
- Last Name
- Select User:
Here you can map a user to the employee if
you want to give employee access to the list of their
appointments in the back-end of the plugin. - Phone Number
- WordPress User
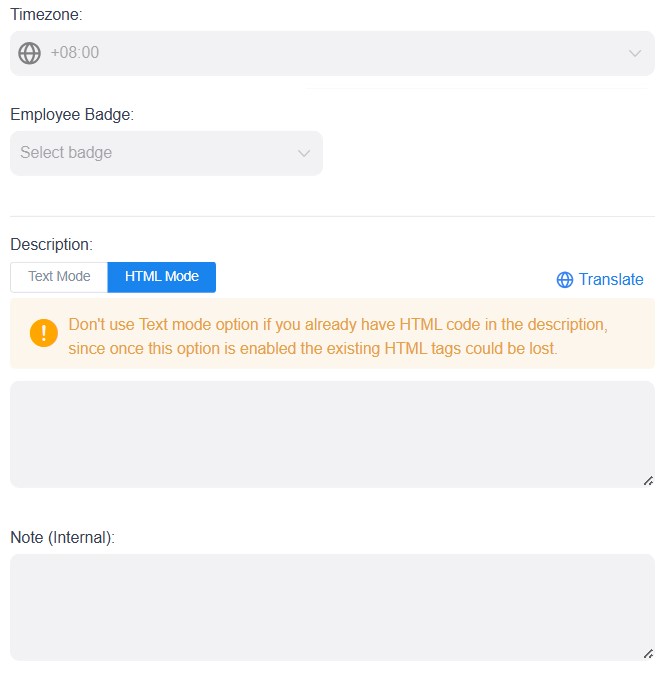
- Time zone:
You may select the time zone of your location. - Employee Badge:
Here you may decide the recognition of the employee. - Description:
Here you may give the description of the employee. - Note (Internal):
This is to have a note of the employee.
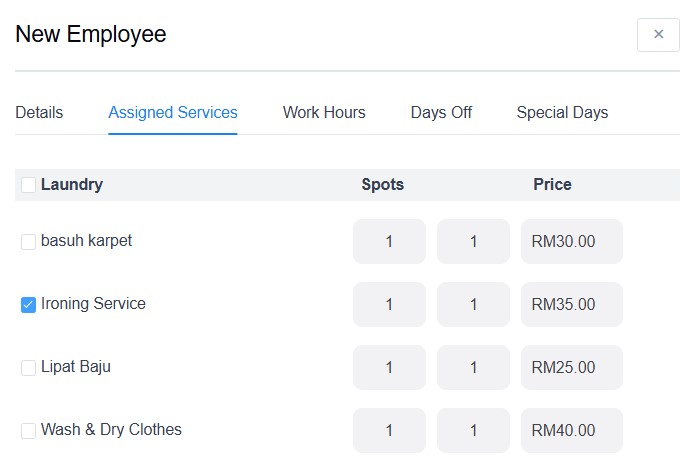
Assigned Services (2/5) #
The image below illustrates the “Assigned Services” section that must be completed. This section displays the services and corresponding prices that the employee is authorized to offer. For instructions on creating a service, please refer to this guide. (Add link to service manual here).
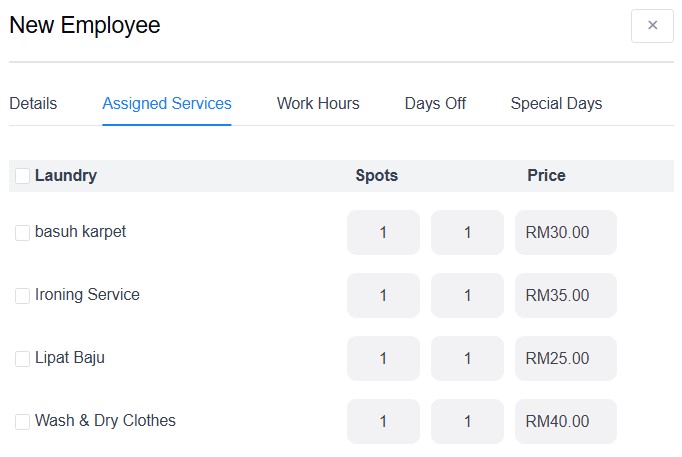
To assign the employee to a service, please check the boxes corresponding to the services the employee can offer, as shown below. The spots indicate the minimum and maximum number of times the employee can provide the service at once. The price reflects the amount that clients will pay for each instance of the service provided by the employee.
Work Hours (3/5) #
The image below pertains to the “Work Hours” section, which outlines the employee’s available times for providing services.
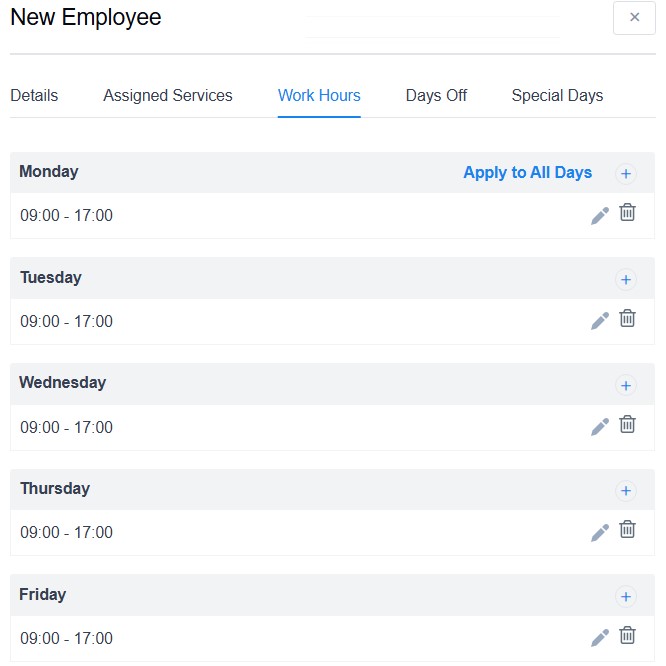
There are 4 available for managing work hours:
- Apply to All Days: Click on “Apply to All Days” to use the same time schedule from Monday for the other days.
- Add Work Hours: Click on the “+” sign for each day to add work hours.
- Edit Work Hours: To modify the work hours for a specific day, click on the pencil icon.
- Delete Work Hours: Click on the trash can icon to remove the work hour details.
Days Off (4/5) #
The image below pertains to the “Days Off” section, which provides information regarding the employee’s scheduled time away from work.
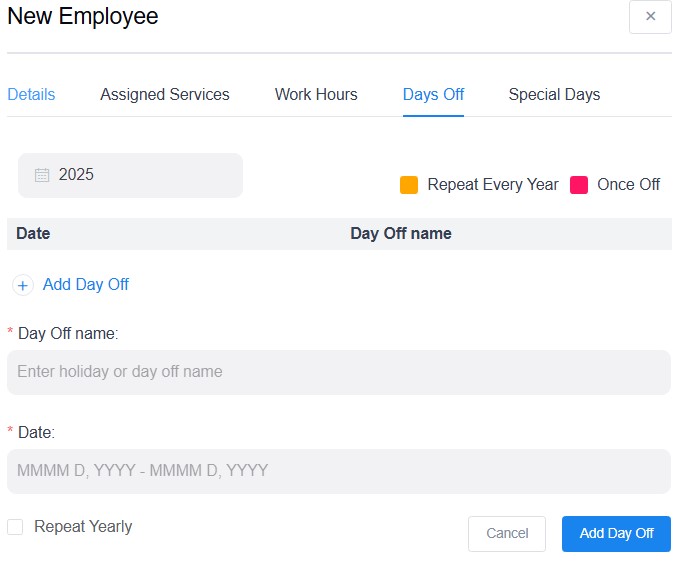
Complete the following fields:
- Year
- Day Off Name:
- Date:
- Repeat Yearly
Once you have filled in the information, click on “Add Day Off” in the image above to confirm your entries.
Special Days #
The image below pertains to the “Special Days” section, which provides information regarding the employee’s special work hours.
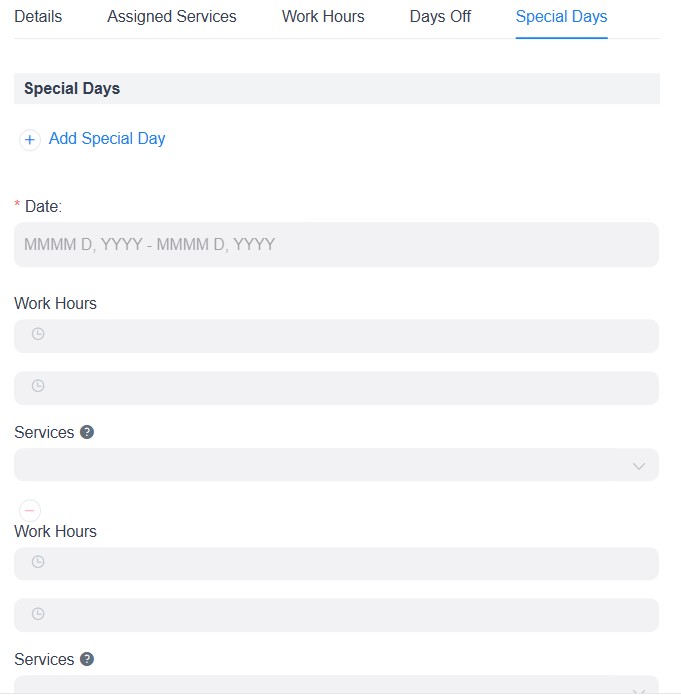
To add a special day, click on “+ Add Special Day.”
Fill in the following fields:
- Date
- Work Hours
- Services
- Location
After entering the information, click on “Save Special Day” to confirm your entries
Saving Employee Details #
After providing information for every section. Click on “Save”.