Skip to content
  • Solutions
  • Resources
  • Events
  • About Us

Create Your Website

Start Building Your Website

Drag & Drop to Build Your Page

Start Selling Online

Selling Product

Reach Your Potential Online Consumers

Booking & Ticketing

Appointment, Rentals and Events

Sales & Marketing Tools

Agent & Affiliate

Boost Your Sales with Agents

Sales Campaign

Direct Customers to the Right Product

Reach Your Audience

Online Email Marketing Tools

Business Overview

Manage Your Store

Business Details and Information

Analytics & Reporting

View Your Online Web Performance

Our Story

Who Are We?

Board Members

Social Media

Facebook

Instagram

Tiktok

Youtube

Github

Reddit

Contact Us

Get in Touch

Support Form

LuluStore

9
  • How to view all orders
  • View Specific Order
  • Overview of an order
  • View, Print, Email and Delete customer invoice
  • To change status of a order
  • Customer History
  • Order Notes
  • Order Actions
  • Import & Export

LuluCreate

8
  • Banner Design: Adding or editing pictures
  • Banner Design: Adding links
  • Banner Design: Text editing
  • Banner Design: Basic Controls
  • Customize your website header
  • Create a page for news or blogs
  • Manage your media inside your website
  • Manage all your website pages

LuluReserve

12
  • Add an appointment
  • Add a Resource
  • Add a Package
  • Add a Category
  • How to add services
  • How to view employees
  • Navigating LuluReserve’s Dashboard
  • Set company-wide days off
  • Set company-wide working hours.
  • How add an employee on LuluReserve
  • How to view your employee on LuluReserve
  • How to view LuluReserve dashboard

LuluPromo

4
  • Create a new Affiliate Group
  • Add a new Affiliate
  • Fine-tune coupon setting by using advanced feature
  • Create a coupon for your customer

LuluBlaster

13
  • Create a recurring email
  • View all your email campaign
  • How to add users into a contact tag – Choose from existing list
  • How to add users into a contact tag – Manually add customer info
  • How to create new tags to be assigned to a contact
  • How to add users into a contact list – Choose from existing list
  • How to add users into a contact list – Manually add customer info
  • Group contacts in a broad spectrum with contact list
  • Add a contact manually
  • How to export your contact list to a CSV file
  • How to import contacts from CSV file
  • How to show all contacts in LuluBlaster
  • LuluBlaster Dashboard

LuluInsight

10
  • Overview
  • Products
  • Categories
  • Variations
  • Orders
  • Coupon
  • Revenue
  • Taxes
  • Stocks
  • Downloads

LuluAdmin

3
  • Business Manager
  • Users
  • Manage your company general information
  • Home
  • Docs
  • LuluBlaster
  • How to import contacts from CSV file

How to import contacts from CSV file

1. Log in and go to your website Dashboard.

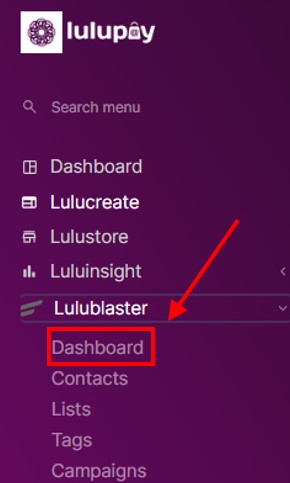
2. On the main Dashboard page, click ‘LuluBlaster’ on the left menu page.

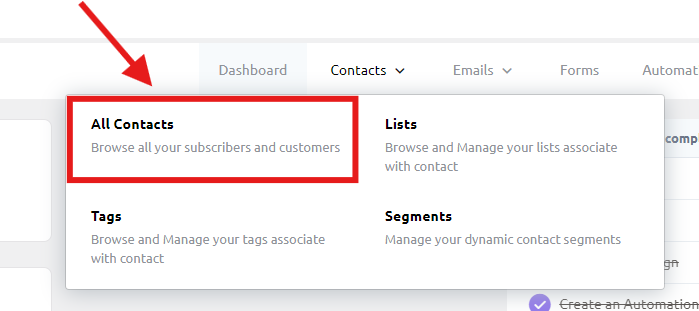
3. On the upper right bar you can see ‘Contacts’, hover over it (Don’t click) and then click on all email contacts

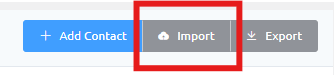
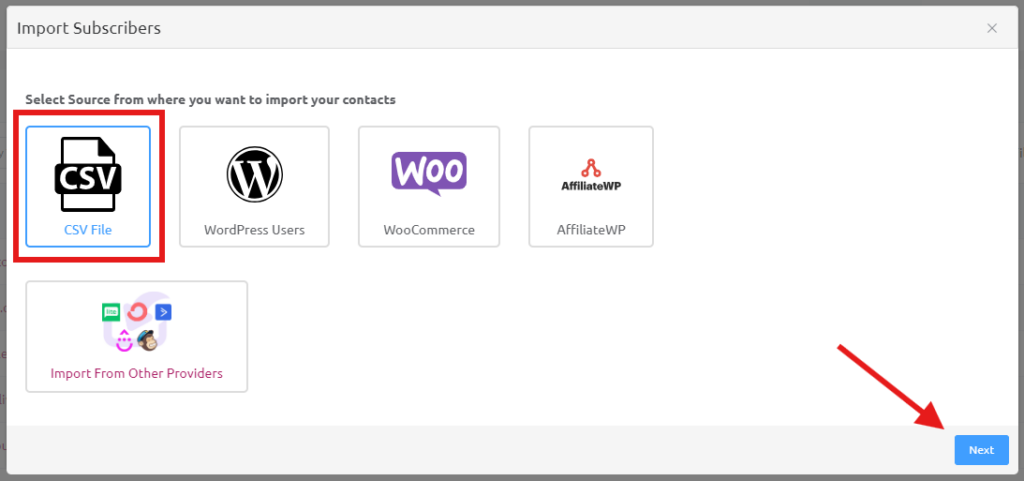
4. On the upper right corner you can see button; Add contacts, Import and Export. Click on Import

5. Click on CSV file and click next

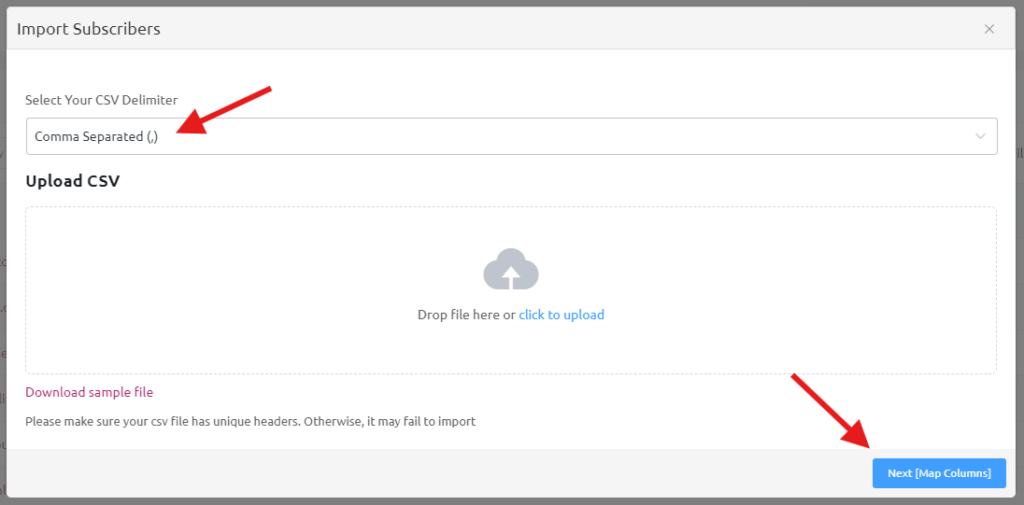
6. Choose ‘Comma seperated (,)’ drag your file inside the cloud OR click at the cloud to choose your CSV file.

Tips: In European countries, comma (,) is used as a decimal point. In this case, use ‘Semicolon Seperated (;)’ for the CSV file to be read properly.

7. Now you can see that there will be :-

CSV Headers (Blue) and Subscriber Fields (Green).

The CSV header is the header of your CSV file. For example here there will be name and email. It is greyed out and cannot be changed.

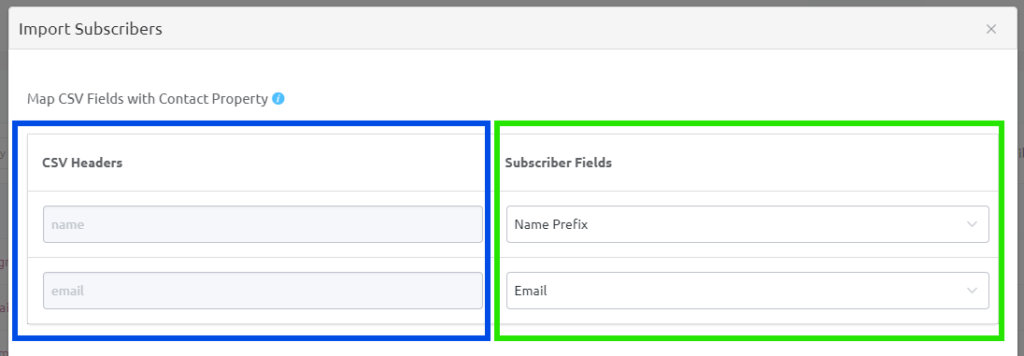
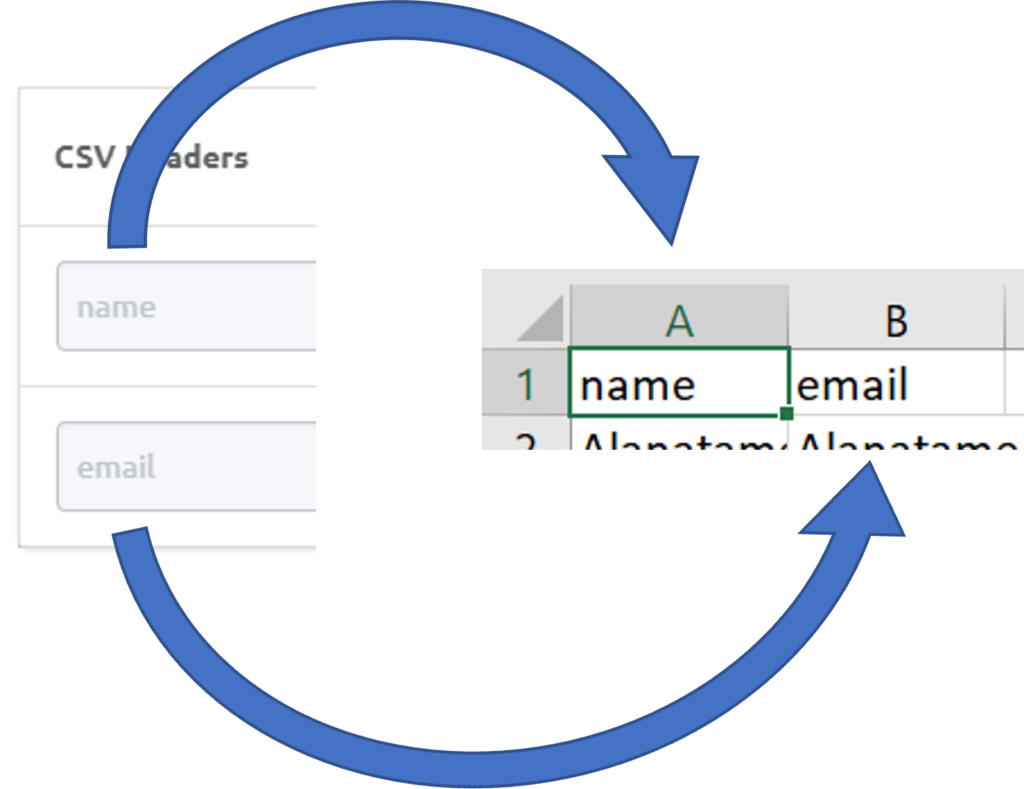
The CSV Headers will follow the first row of the CSV file.

8. The ‘Subscriber fields’ (Green) is which one will correspond to the list of contact in the LuluBlaster. Please take time and choose properly.

9. Then you will choose Lists and Tags. This basically group the contact to a list and you can tag what this list is. Learn more here.

Update Subscribers is when the contact is already in the list, update their information (Address, Zip Code etc.) with the new information inside the CSV file.

New Subscriber Status is where you choose where the contact is subscribe with LuluBlast or not. Leave at ‘Subscribed’ for the contact to continue receive email blast.

When everything is finalized, click ‘Confirm Import’

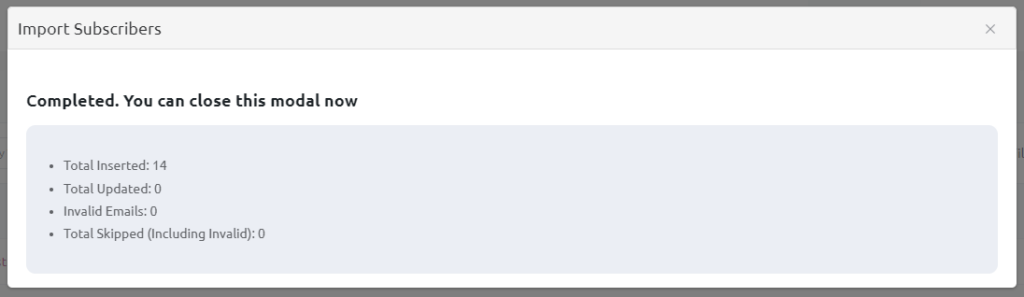
10. The contact is successfully imported to the contact list. Click the ‘X’ to close.

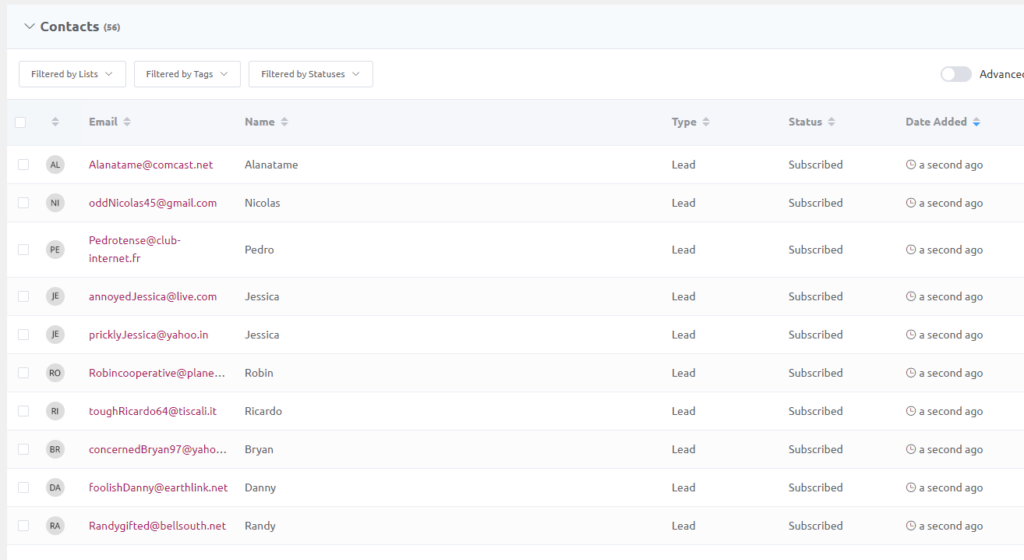
11. The new contact will be reflected at the contact list

What are your Feelings
Share This Article :
  • Facebook
  • Twitter
  • LinkedIn
  • Pinterest
Still stuck? How can we help?

How can we help?

Updated on March 10, 2025
How to export your contact list to a CSV fileHow to show all contacts in LuluBlaster

Leave a Reply Cancel reply

Your email address will not be published. Required fields are marked *

Support

Help center

Hire a Professional

Solutions

Online store builder

Website builder

Ecommerce website

Products

E-Commerce

Booking Services

Digital Marketing

Copyright © 2024 All Right Reserved – Lulupay Sdn Bhd
Facebook Instagram Tiktok Youtube
E-mail Call Facebook Chat
For more information visit Helper page.