Skip to content
  • Solutions
  • Resources
  • Events
  • About Us

Create Your Website

Start Building Your Website

Drag & Drop to Build Your Page

Start Selling Online

Selling Product

Reach Your Potential Online Consumers

Booking & Ticketing

Appointment, Rentals and Events

Sales & Marketing Tools

Agent & Affiliate

Boost Your Sales with Agents

Sales Campaign

Direct Customers to the Right Product

Reach Your Audience

Online Email Marketing Tools

Business Overview

Manage Your Store

Business Details and Information

Analytics & Reporting

View Your Online Web Performance

Our Story

Who Are We?

Board Members

Social Media

Facebook

Instagram

Tiktok

Youtube

Github

Reddit

Contact Us

Get in Touch

Support Form

LuluStore

9
  • How to view all orders
  • View Specific Order
  • Overview of an order
  • View, Print, Email and Delete customer invoice
  • To change status of a order
  • Customer History
  • Order Notes
  • Order Actions
  • Import & Export

LuluCreate

8
  • Banner Design: Adding or editing pictures
  • Banner Design: Adding links
  • Banner Design: Text editing
  • Banner Design: Basic Controls
  • Customize your website header
  • Create a page for news or blogs
  • Manage your media inside your website
  • Manage all your website pages

LuluReserve

12
  • Add an appointment
  • Add a Resource
  • Add a Package
  • Add a Category
  • How to add services
  • How to view employees
  • Navigating LuluReserve’s Dashboard
  • Set company-wide days off
  • Set company-wide working hours.
  • How add an employee on LuluReserve
  • How to view your employee on LuluReserve
  • How to view LuluReserve dashboard

LuluPromo

4
  • Create a new Affiliate Group
  • Add a new Affiliate
  • Fine-tune coupon setting by using advanced feature
  • Create a coupon for your customer

LuluBlaster

13
  • Create a recurring email
  • View all your email campaign
  • How to add users into a contact tag – Choose from existing list
  • How to add users into a contact tag – Manually add customer info
  • How to create new tags to be assigned to a contact
  • How to add users into a contact list – Choose from existing list
  • How to add users into a contact list – Manually add customer info
  • Group contacts in a broad spectrum with contact list
  • Add a contact manually
  • How to export your contact list to a CSV file
  • How to import contacts from CSV file
  • How to show all contacts in LuluBlaster
  • LuluBlaster Dashboard

LuluInsight

10
  • Overview
  • Products
  • Categories
  • Variations
  • Orders
  • Coupon
  • Revenue
  • Taxes
  • Stocks
  • Downloads

LuluAdmin

3
  • Business Manager
  • Users
  • Manage your company general information
  • Home
  • Docs
  • LuluBlaster
  • Create a recurring email

Create a recurring email

Recurring emails helps you to send an email that you set albeit daily, weekly and monthly. after you set up, the email that you set will be sent automatically to your recipient that you set.

To access or set your recurring email please follow as below:-

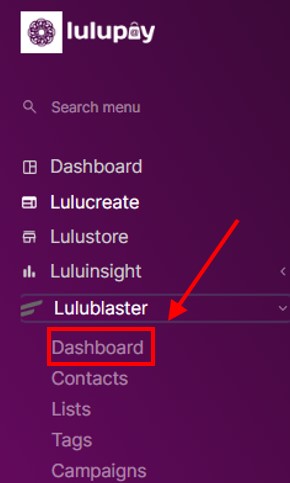
1. Log in and go to your website Dashboard.

2. On the main Dashboard page, click ‘LuluBlaster’ on the left menu page.

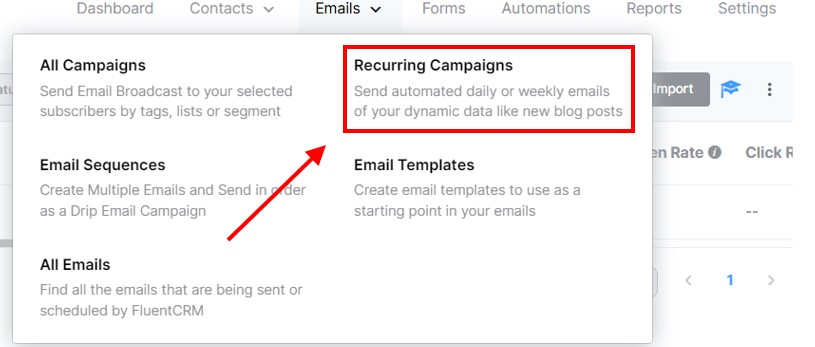
3. On the upper right bar you can see ‘Emails’, hover over it (Don’t click) and then click on all ‘All Campaigns’

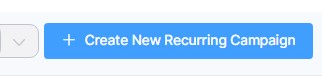
4. This is where all your recurring email will displayed here. Click at ‘Create New Recurring Campaign’ to create yours.

5. Insert your email title, and select the recurring date that you want you send your email albeit daily, weekly or monthly. For this example, it will be sent 25th of every month at 10 in the morning. Mark the checkbox at the bottom to send emails automatically. If not, the campaign will be set as draft.

Click ‘Continue to next step [conditions]’ to continue.

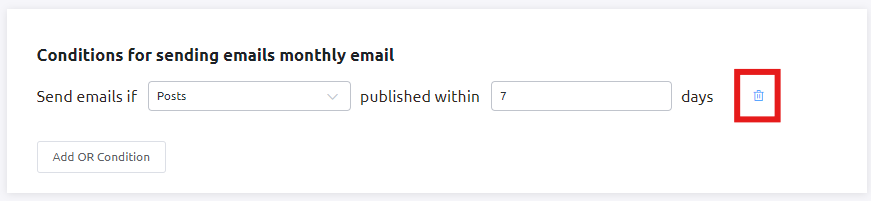
6. Conditions is where you add additional options for the system to follow other than the time to send as previously. For this example, we will send the email monthly without any conditions. So, click the trash button on the right side of the statement to remove it. The system will tell you that it will send without any conditions.

Click ‘Continue To Next Step [Recipients]’ to continue.

7. Next, we will be choosing the recipients of the recurring email. On the top, you can select subscribers by List & Tag or Dynamic Segment or Advanced filter. Every options will have its own settings

By List & Tag
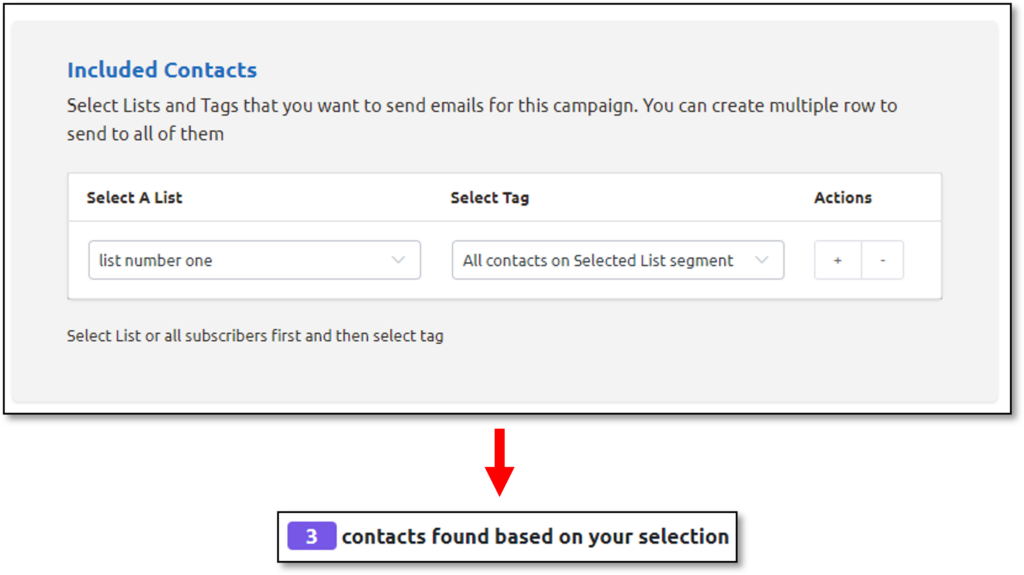
This Option will send the recurring email to the contacts that you already put in a list and tag. The list that you choose can be included list or excluded list. This example will show the included list.
If we choose list ‘list number one’ that we have created before, the system will detect all 3 contact that we choose to receive the email.
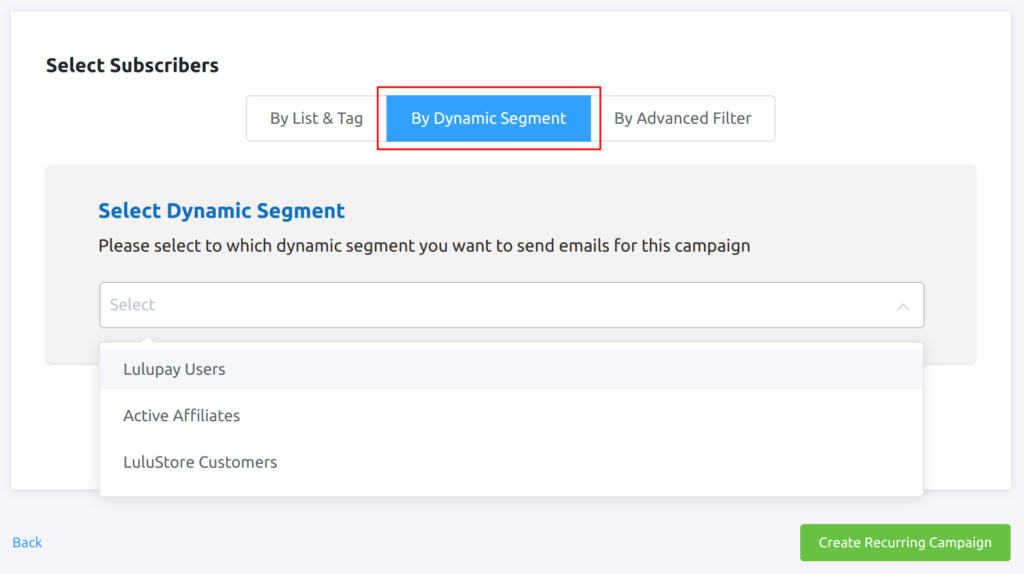
By Dynamic Segment
If you want to have the email recipients by your dynamic segment list, just choose ‘By Dynamic Segment’ and choose your list. Click ‘Create Recurring Campaign’ to continue.

8. Next, you will be greeted with the email drafting tool. this is where you can create what the email will be when the customer opens it.

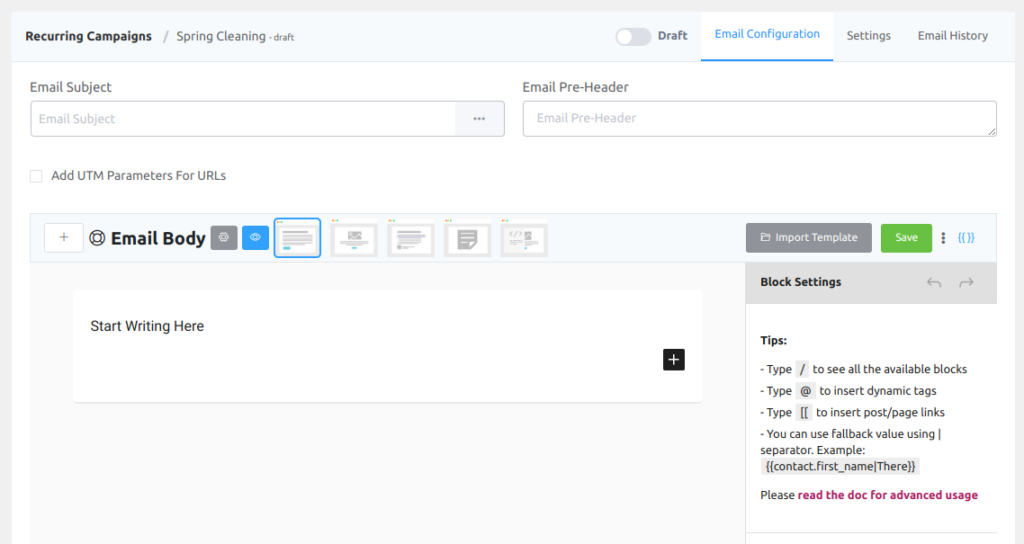
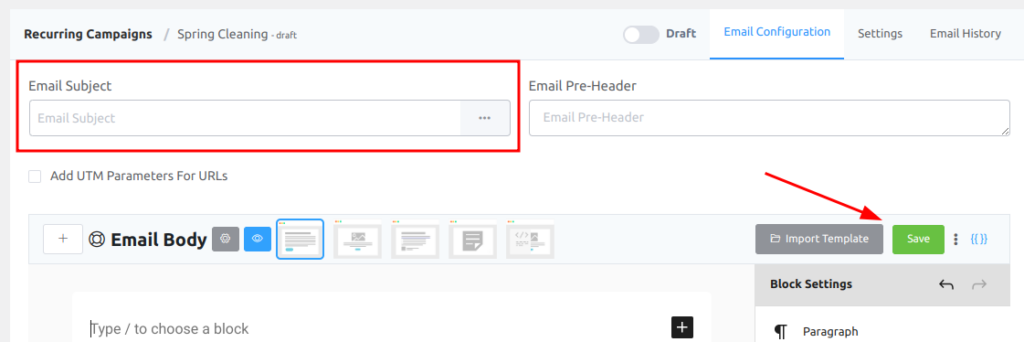
9. After you are finished, don’t forget to insert your email subject and click ‘Save’

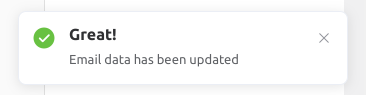
10. A notification will pops up from your bottom right screen to indicate the email is saved.

What are your Feelings
Share This Article :
  • Facebook
  • Twitter
  • LinkedIn
  • Pinterest
Still stuck? How can we help?

How can we help?

Updated on March 10, 2025
View all your email campaign

Leave a Reply Cancel reply

Your email address will not be published. Required fields are marked *

Support

Help center

Hire a Professional

Solutions

Online store builder

Website builder

Ecommerce website

Products

E-Commerce

Booking Services

Digital Marketing

Copyright © 2024 All Right Reserved – Lulupay Sdn Bhd
Facebook Instagram Tiktok Youtube
E-mail Call Facebook Chat
For more information visit Helper page.